Showing posts with label drive. Show all posts
Showing posts with label drive. Show all posts
Friday, March 3, 2017
Where is C drive in Windows 10 Solved Beginners Guide
Where is C drive in Windows 10 Solved Beginners Guide
Where is C drive in Windows 10 - Thats the question i was asked by our blog reader. Though i
answered the question lot of folks are asking the same question..So i created a separate post on
where is c drive located in Windows 10. So,if you too have question like how to find c drive on my
windows 10 PC, then i hope this guide may be helpful for you .
First, Normally, windows 10 being a User friendly Operating System allows us to make our job more
than one way. So, to open c drive there are variety of methods available like using powershell and
start typing set-location c: , dir commands will display the information on that drive.
However, those things wont help beginners, what help is using the traditional way which is using
windows explorer or File Explorer.
1) First, Open file explorer
Dont know know how to open file explorer ?, dont worry, check the below link
[Helpful link : What is file explorer ? and how to open in Windows 10]
2) There, you will find the list of drives that were available on your System

3) Find the "Local disk C" , you can find it easier by looking for windows (logo) icon in the drive, which is your C drive..
Thats it..
Hope it is helpful.
Click to read all basic tutorials..
answered the question lot of folks are asking the same question..So i created a separate post on
where is c drive located in Windows 10. So,if you too have question like how to find c drive on my
windows 10 PC, then i hope this guide may be helpful for you .
First, Normally, windows 10 being a User friendly Operating System allows us to make our job more
than one way. So, to open c drive there are variety of methods available like using powershell and
start typing set-location c: , dir commands will display the information on that drive.
However, those things wont help beginners, what help is using the traditional way which is using
windows explorer or File Explorer.
1) First, Open file explorer
Dont know know how to open file explorer ?, dont worry, check the below link
[Helpful link : What is file explorer ? and how to open in Windows 10]
2) There, you will find the list of drives that were available on your System
3) Find the "Local disk C" , you can find it easier by looking for windows (logo) icon in the drive, which is your C drive..
Thats it..
Hope it is helpful.
Click to read all basic tutorials..
Available link for download

Saturday, February 25, 2017
Windows 10 C Drive Full without any reason Solved solution
Windows 10 C Drive Full without any reason Solved solution
My c drive suddenly Full without reason in Windows 10 - This time its not for my friends, to me??
Creators Update, Windows 10 Anniversary Update, and other editions of Windows like Windows 10
earlier builds like Aug 2015 and Nov 2015 builds..
![Windows 10 C Drive Full without any reason [Solved]](https://blogger.googleusercontent.com/img/b/R29vZ2xl/AVvXsEhgy4LcOlnzCqg7ti9DuIXcXrAAaMshbvEbvUIATCcLhgL9OX4DeDATplXbZBTzjLY_6i-gSsd0pF0M-m18hoZ4l8V4cfWdFflyCFqt1Iwx3mU0h1U_f2r9X29yknpkA9wkTwsHwz4skZw/s400/c-drive-full.gif "Windows 10 C Drive Full without any reason [Solved]")
1) Right click on This PC and Select Properties.
[See : How to make Windows to show desktop icons in Windows 10 ]
2 )Click on System Protection on the left pane.
??( I smiled because i fixed the problem :0 ) If you are experiencing the same problem and have
questions like "c drive keeps filling up in my windows 10 PC" or "My c drive suddenly in full
windows 10" or any other related query, then here is a simple guide that may help you to fix the
problem. -Works on Windows 10
Creators Update, Windows 10 Anniversary Update, and other editions of Windows like Windows 10
earlier builds like Aug 2015 and Nov 2015 builds..
How to clean it?
There, are many things that may fill up your PC like installing many softwares, your PC has more
files and something related to it..
But, sometimes you may find your C drive full without any reason, like it happened to me, I just
wrote a blog post about how to Check amount of free space in hard disk or SSd you can see it
[here] but when i returned after my breakfast i was shocked to see My hard disk Space becoming
almost full and a low space notification starts to appear.
I dont know, what happened to my PC, so i started to figure out the things.. Which i worked..
First, i checked Whether System restore point was full.
How to clean System Restore Points in Windows 10
1) Right click on This PC and Select Properties.
[See : How to make Windows to show desktop icons in Windows 10 ]
2 )Click on System Protection on the left pane.
3) It will Open System Properties
4) Select the C drive on the Protection settings
5) Click Configure
6) It will open System Protection for Local Disk C:
7) Click on Delete
8) Click on Apply - > OK.
Unfortunately, it doesnt showed much result to me, So i moved to the next step which is
clearing Recycle Bin
How to delete Recycle bin files in Windows 10
1) Open recycle bin
[ Helpful link : Where can i find recycle bin in Windows 10]
2) Press Ctrl + A, and then Shift + Delete keys on Keyboard
Thats it..
It doesnt worked for me, because i usually delete files using the shift + Del method which
will permanently delete all your files.
So, i moved to clear temp section..
How to clear temp in Windows 10..
Refer the below video..
[Video tutorial]
It cleared some free space, but still im not satisfied..
Next, i thought to use disk clean up utility but, i thought it wont yield better result, because i only
performed the disk cleanup the previous day.
At last, i done something unusual (i dont know how it appeared on my mind) its looking on Event
viewer.
I finally solved the problem. What happened to my PC was,it faced with Blue screen of Death error
again and again.
So, it was the log files that increased my PC storage, Clear it and you will get back your free hard
drive space of C drive.
Since, it worked for me on the previous step, i had stopped. However, if your issue was still resolved,
try deleting or uninstalling a program that occupies your hard disk Space.
Thats it..
Click to read all latest articles.
Available link for download
Thursday, February 16, 2017
How to Install a Hard Drive with Pictures
How to Install a Hard Drive with Pictures
 1. Power down the computer.Shut off the power supply in the back. Even if you can access the inside where it stands, you need to unplug the computer. Otherwise, unplug the computer and place it somewhere that allows you to get inside.
 2. Remove the case panels. You may need a Phillips head screwdriver, but most newer computers have thumbscrews. You will need to remove both sides so that you can screw the hard drive in on both sides.
- Ensure that you do not have any static electricity.Touch a metal object (other than your computer), such as a doorknob, to discharge any existing static electricity that you may have.
 4. Make sure you are grounded.If your computer is still plugged in (but the power supply is switched off), you can ground yourself by touching any metal part of the case. Otherwise, make sure that you are grounded before starting to work on the inside of the computer. This will prevent electrostatic shock from damaging the components of your computer.
 5. Remove the old drive (if applicable).If you are removing an old hard drive, make sure all of the cables are disconnected from both the motherboard and the power supply. Unscrew all the screws on both sides of the hard drive, and then slide it out of the housing.
- You may need to remove more cables or cards in order to access the hard drives in a tight case.


 6. Insert your new drive.Remove it from the antistatic packaging and slide it into an open space in the hard drive housing. The drive should slide directly in, and the holes on the side of the drive should line up to the screw guides on the housing.
- If you can, use a slot that has some space around it. This will improve airflow and lead to a cooler system, but is not a critical concern.
 7. Secure the hard drive.Once the hard drive has been inserted, use the screws that came with it to secure the hard drive in the housing. Ideally you should use two screws on each side of the hard drive. If the hard drive is loose, it can rattle and cause more noise and lead to physical damage.
- Tighten the screws to a firm tightness, but don’t overtighten as that may cause damage as well.
 8. Connect a SATA hard drive to the motherboard.Newer hard drives will use SATA cables, which are thin and resemble USB cables. Use a SATA cable to connect the hard drive to the motherboard. SATA cables can be connected in either direction.
- If you are connecting your primary hard drive, the SATA cable should be plugged into the first SATA channel. This may be labeled SATA0 or SATA1. Refer to your motherboard documentation for detailed information for your motherboard.
- Secondary drives should be connected to the next available SATA channel.
 9. Connect a PATA (IDE) hard drive to the motherboard.IDE drives are older model hard drives that can be identified by the long rows of pins on the back. IDE Drives are connected via an IDE cable, which is wide and flat. The cable is usually gray in color
- The blue end of the cable plugs into the motherboard. The black connector plugs into your primary (Master) drive, while the black connector plugs into the secondary (Slave) drive if applicable.
- Set the jumper for your primary drive to Master. The jumper diagram should be printed onto the hard drive. If you are installing a secondary drive but it is the only drive connected to the cable, it should be set to Master as well.
 10. Connect the power supply to the hard drive.Most newer power supplies have SATA power connectors, though older power supplies typically only have Molex (4 pin) connectors. If this is the case, and you are installing a SATA drive, you will need a Molex-to-SATA adapter. IDE drives will use the Molex connector.Make sure that all of your connections are secure. Ensure that none of the cables can come undone by wiggling them a little bit.
 11. Close up your computer.Replace the case sides and reconnect your cables if you had to move the case to work on the inside. Turn the power supply back on and then turn your computer on.
 12. Finish the installation.Once you’ve got everything connected and the computer turned back on, you’ll need to finish the installation of the hard drive from your computer. If you are replacing your primary drive, you’ll have to reinstall your operating system. If you are adding a new drive, youll need to format the drive before you can use it..


Method 2 Laptop Hard Drive
 1. Power down your laptop.Shut your laptop down completely (don’t put it in Sleep mode). Turn it over and remove the battery from the back of the laptop. This will help prevent the possibility of electrocution.
 2. Open the hard disk panel.This panel is located on the bottom of the laptop. You will need a small Phillip’s head screwdriver in order to remove the screws and the panel. The panel can be identified by the hard drive logo printed next to it.Almost every laptop can only fit one hard drive at a time. Some of the higher-end laptops may be able to support two. If you are replacing your only hard drive, you will need to reinstall your operating system after replacing it.
- Ensure that you do not have any static electricity. Touch a metal object (other than your computer), such as a doorknob, to discharge any existing static electricity that you may have.
 4. Unscrew the hard drive.Depending on the laptop, you may have to remove a screw or two before you can remove the hard drive. Not all laptop hard drives are secured by screws.
 5. Pull the ribbon to release the hard drive.The hard drive will pop back about half an inch, allowing you to remove it from its housing. Place your old hard drive somewhere safe in case you need to retrieve data off of it.
 6. Insert your new hard drive.Ensure that you insert it with the correct side facing out. Once you’ve placed the hard drive in the housing, press it firmly into the connectors. Do not force the hard drive, or you may damage the connectors. Once the hard drive is secure, reinsert any screws.
7. Close up the laptop.
Once the hard drive is installed, close up the panel and reinsert the battery. Make sure the panel is securely closed. You will now need to prepare the new drive:


Available link for download
Friday, February 10, 2017
Aero Drive v1 0 Apk Mod Money Unlocked
Aero Drive v1 0 Apk Mod Money Unlocked
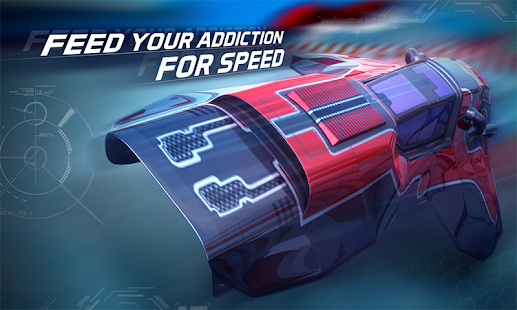
Aero Drive APK Download Google Play
Requires Android: 2.3 and up
Download APK
Download APK: Mirror 1 | Mirror 2
Download APK Mod: Mirror 1 | Mirror 2
Available link for download
Subscribe to:
Posts (Atom)